When to hand-sand wooden products and when to use a machine

In the world of woodworking, sanding holds a special place. It is far more than simply removing roughness — it is a genuine craft that directly determines the final look of a product, how it feels to the touch and how well the finish will last. A properly sanded surface is the guarantee that stain will lie evenly, lacquer will not blotch and oil will soak in uniformly, bringing out the full beauty of the wood grain. Yet every craftsman, whether a seasoned professional or a beginning joiner, inevitably faces the same question: which sanding method to choose? Should you pick up a sheet of sandpaper and work every curve by hand, trusting your own feel, or reach for a power tool that promises speed and a perfectly flat surface?
There is no single right answer to this question. The choice between hand and machine sanding is not a clash of old traditions against new technology. It is, rather, a considered decision based on many factors: from the species of wood and the geometry of the piece to the desired end result and the scale of production. The wrong choice of tool or technique can not only ruin the blank but also undo all the work done in the previous stages. In this article we will examine in detail the nuances of both approaches, so that you can confidently decide when to trust the power of a machine and when to rely on the sensitivity of your own hands. We will look at the various types of sanding equipment, the subtleties of hand work, and hybrid methods that combine the best of both worlds.
When hand sanding is indispensable: delicacy and control
Hand sanding is the very foundation from which every woodworker’s journey begins. Despite its apparent simplicity, the method demands a deep understanding of the material, patience and finely honed skills. The main advantage of the manual approach is the unrivalled level of control it gives over the process. Working by hand, the craftsman literally feels the wood through their fingertips, sensing the slightest unevenness, changes in fibre density and potential defects. This tactile contact allows instant decisions: to press harder here, ease off there, change the direction of movement or switch to a finer abrasive. That is especially critical when working with delicate, intricate and valuable pieces.
Imagine restoring an antique piece of furniture with its elegant carving, fine inlays and the patina of age. Using a powerful sander in such a case is like cracking nuts with a sledgehammer. The risk of irreparably damaging the unique decoration, of “rounding over” crisp edges or removing too much material and destroying the historical integrity of the object is extremely high. Hand sanding, by contrast, lets you work precisely and carefully. Using small blocks, sponges or simply a sheet of sandpaper folded several times, you can reach the most awkward spots without touching the neighbouring elements. This is jeweller’s work, where the result matters more than the pace.
Another area where hand sanding is irreplaceable is working with small parts and pieces of complex curved shape. Cabriole legs, twisted balusters, carved mirror frames — every one of these elements calls for an individual approach. A power tool with its standard working surface simply cannot follow all the curves and hollows, risking leaving unsanded patches or, worse still, creating new defects — flats and “dips” where none should be. Hand work makes it possible to follow the geometry of the part perfectly, preserving the smoothness of the lines and the designer’s intent.
In addition, hand sanding is the final and mandatory stage before applying many types of finish, especially oils and certain stains. Even after the most delicate machine work, microscopic circular scratches (the so-called “swirl marks”) can remain on the wood surface and only become visible after the final finish. By going over the surface by hand with fine-grit sandpaper along the grain, we not only remove these defects but also give the surface a special smoothness and silkiness, preparing it to take the finishing coat perfectly.
Nor should we forget about working with soft, resinous woods such as pine, spruce or cedar. These materials are very sensitive to the overheating that inevitably occurs when a power tool runs at high speed. As it heats up, the resin softens, clogs the abrasive and leaves dirty, hard-to-remove marks on the surface. Hand sanding takes place at low speeds and without significant heat build-up, which avoids such problems and achieves a clean, uniform surface.
Thus, the manual method is a choice in favour of control, precision and delicacy. It is indispensable when working with unique, valuable and complex-shaped pieces.
- Restoration and antique work: preserving the original details and patina.
- Intricate carving and curved surfaces: reproducing the geometry precisely, without distortion.
- Small and delicate parts: jeweller’s work in hard-to-reach places.
- Preparation for the finishing coat: removing micro-scratches left by the tool for a flawless result.
- Working with soft, resinous woods: preventing overheating and abrasive clogging.
Ultimately, hand sanding is a dialogue between the craftsman and the material, where every gesture matters and the result speaks for itself.

Power and speed: when machine sanding takes the stage
If hand sanding is about precision and delicacy, machine sanding is about productivity, speed and perfect geometry on large surfaces. In modern production, where deadlines and volumes matter, doing without a power tool is virtually impossible. The main and undeniable advantage of machine sanding is the enormous saving of time and physical effort. A task that would take a craftsman hours by hand is completed in a matter of minutes with a sander. This is especially relevant when working on large surfaces: worktops, doors, glued panels, carcass-furniture components or flooring.
The main task in the early stages of processing wood is levelling the surface and calibrating thickness. After sawing or jointing, tool marks, small differences in height and other defects remain on the blanks. Removing them by hand while keeping the surface perfectly flat is a practically impossible task. This is where belt or random-orbital sanders come to the rescue. A powerful motor combined with a coarse-grit abrasive quickly removes the required layer of wood, eliminates all unevenness and achieves a perfectly flat surface that will serve as the basis for further, finer work.
Machine sanding is also indispensable for removing old paint and lacquer coatings. Stripping several layers of old lacquer or paint by hand is a Herculean task that demands an enormous amount of time and abrasive material. A sander handles this job efficiently and quickly, exposing bare wood and preparing it for a new finish. The only important thing is to choose the right type of tool and grit so as not to damage the blank itself, especially when it comes to veneered surfaces, where the layer of fine wood is very thin.
Different types of sanders are designed for different tasks. Belt sanders are the “heavy artillery”. They are aggressive, high-output and ideal for coarse work, levelling and removing large amounts of material. Random-orbital (or orbital) sanders work more gently. Thanks to the complex motion of the pad, which rotates and oscillates along an orbit at the same time, they leave fewer visible scratches and are excellent for intermediate and finish sanding of flat and slightly curved surfaces. Vibrating (orbital finishing) sanders are gentler still and are often used for the final touch-up of corners and edges that are hard to reach with a random-orbital sander.
Another important advantage of modern power tools is their dust-extraction systems. Sanding, especially by machine, produces a huge amount of fine wood dust, which is harmful to health and gets in the way of work, clogging the abrasive and hiding the surface being worked. Most modern sanders are fitted with ports for connecting an industrial vacuum cleaner or have their own dust-collection containers. This makes the work not only cleaner and safer but also higher in quality, since the abrasive stays effective for longer and the craftsman can constantly see the result of their actions.
Of course, working with a power tool requires certain skills and care. Uneven pressure, holding the machine in one place for too long or the wrong speed can lead to “dips”, dents and other defects that are very hard to correct. Yet with the proper experience and an understanding of how the tool works, machine sanding becomes an indispensable helper, allowing you to achieve superb results in the shortest possible time and with minimal effort. It is a choice in favour of efficiency and productivity.
Belt sander: heavy artillery for coarse work
The belt sander is rightly considered the most powerful and productive handheld tool in a joiner’s arsenal. Its design is simple and effective: an abrasive belt, glued into a loop, moves at high speed over two rollers. Thanks to this, a belt sander can remove a significant layer of wood in a single pass, which makes it the ideal tool for rough, coarse work. If you need to quickly level a roughly sawn board, strip an old layer of paint, bring a large part to size or remove serious surface defects, a belt sander will do it better and faster than any other tool.
The main use of a belt sander is working on large and relatively flat surfaces. For example, when making a solid worktop from glued laths, small differences in height inevitably arise at the glue joints. Removing them with a hand plane can be problematic, especially if the wood has an interlocked grain. A belt sander with a coarse-grit abrasive (P40–P60) will easily handle this task, creating a single, level plane. Likewise, when laying a plank floor or decking, a belt sander is used to level the whole surface before the final finish.
Another important function of the belt sander is forming coarse roundovers and chamfers on the ends of blanks. By fixing the machine in a stationary position (many models come with special clamps for this), you can create the equivalent of a small bench sander. By bringing the part up to the moving belt, you can quickly and neatly round over sharp edges, give a part the required shape or sharpen a tool. This is especially handy in the batch production of small items, where the ends need to be processed quickly and uniformly.
However, the high power and aggressiveness of a belt sander demand special attention and a steady hand from the operator. This is not a tool you can use in a relaxed manner. One wrong move, too much pressure or lingering in one spot, and a deep hollow instantly forms on the surface — one that will be extremely difficult, and sometimes impossible, to correct without reducing the overall thickness of the part. You should always work with a belt sander while it is moving, guiding it smoothly and evenly along the grain of the wood. Begin and end each stroke off the edge of the blank to avoid “gouging” at the ends.
The choice of abrasive belt grit for a belt sander depends directly on the task at hand. For the coarsest work, such as removing paint or levelling very uneven surfaces, belts with a P40–P60 grit are used. For intermediate sanding and removing scratches left by coarse abrasive, P80–P120 belts are suitable. Using finer-grit belts on a belt sander is generally impractical. Their main purpose is fast, efficient rough work. For fine, delicate sanding there are other, more suitable tools.
It is also important to remember the direction of sanding. A belt sander should be used strictly along the direction of the wood grain. Sanding across the grain leaves deep, hard-to-remove scratches that will spoil the appearance of the piece, especially after stain or oil is applied. A belt sander is a powerful ally in the fight against unevenness and defects, but it demands respect and understanding. In skilled hands this tool can work wonders, saving hours of working time and preparing a perfect base for further, finer and more careful work.

Random-orbital sander: the versatile all-rounder for a perfect flat surface
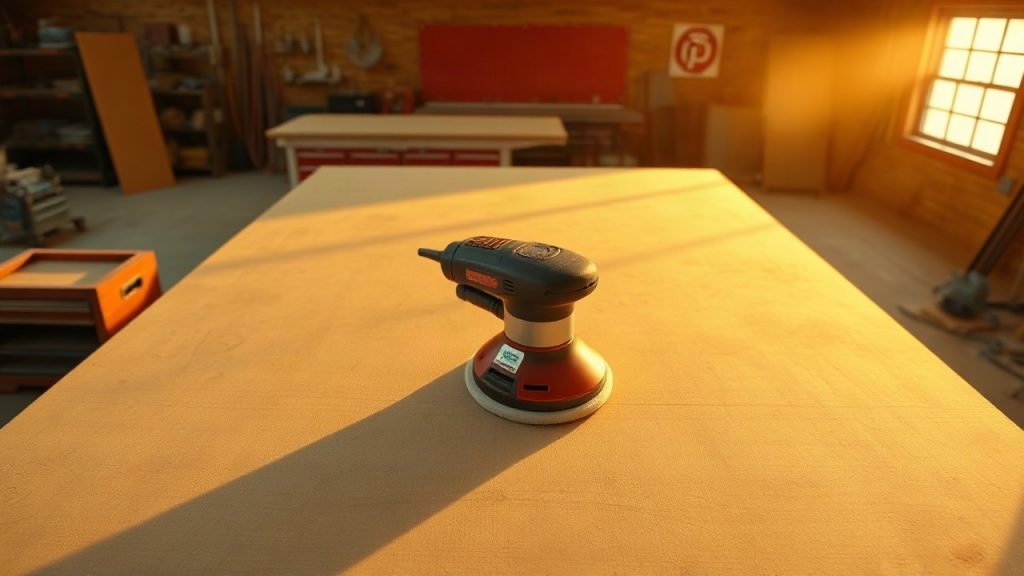
The random-orbital, or orbital, sander is perhaps the most versatile and frequently used tool for sanding wood. Its popularity is due to a unique operating principle. The working pad performs two kinds of motion at once: it rotates about its own axis and simultaneously oscillates along a small orbit (the eccentricity). This complex motion means that every point of the abrasive disc constantly moves along a new path, leaving no pronounced unidirectional scratches on the surface. As a result, the sanded surface comes out very smooth and uniform, practically ready for the finishing coat.
The main advantage of a random-orbital sander over belt and vibrating machines is the ideal balance between output and quality of finish. It removes material less aggressively than a belt sander, which significantly reduces the risk of ruining the blank. Yet it is far more productive than a vibrating sander, which allows it to be used on fairly large areas. This makes the random-orbital sander the ideal tool for intermediate and finish sanding of worktops, furniture fronts, doors and other flat or slightly curved parts.
Thanks to the random path of the abrasive, a random-orbital sander is less sensitive to the direction of sanding. Unlike a belt sander, where working across the grain is strictly forbidden, an orbital sander can be used in any direction without fear of leaving coarse scratches. Nonetheless, for the best result professionals still recommend keeping to the general direction of the grain, especially on the final passes with fine-grit abrasive. This guarantees the complete absence of visible working marks once the finishing coat is applied.
Another important merit of the random-orbital sander is its ability to work not only on flat but also on curved surfaces. The soft pad (backing plate) to which the sanding discs are attached can flex slightly, following the smooth contours of a part. This makes it possible to sand concave or convex fronts, elements of chairs and armchairs, and other parts of complex geometry cleanly, where using a belt or vibrating sander would be difficult. Of course, it is not suitable for very tight curves and carving, but it copes superbly with most standard joinery tasks.
Modern random-orbital sanders are fitted with speed regulators, which further extends their versatility. At low speeds you can carry out delicate sanding or polishing, and at high speeds you can quickly remove material or strip an old finish. An effective dust-extraction system is standard on quality random-orbital sanders. Working with a connected vacuum cleaner not only makes the process cleaner but also extends the life of the abrasive discs, since dust does not clog their working surface.
The choice of abrasive discs for a random-orbital sander is huge and covers the whole range of grits: from P40 for coarse levelling to P400 and above for finish sanding under lacquer or oil. Sanding usually proceeds in several stages, with the grit reduced step by step. For example, you can start with P80 to remove the main unevenness, then move to P120 to eliminate scratches from the previous step, and finish with P180 or P240 to achieve a perfectly smooth surface. It is important not to skip steps and to remove dust thoroughly after each change of abrasive.
Thus, the random-orbital sander is an indispensable tool in any joinery workshop. Its versatility, high quality of finish and ease of use make it the optimal choice for 90% of tasks involving the sanding of flat and curved surfaces.
Vibrating sander: master of finishing and corners
The vibrating, or orbital finishing, sander is a tool for finer, more delicate work. Unlike its belt and random-orbital counterparts, it is not designed for the rapid removal of large amounts of material. Its forte is the final touch-up of a surface, working internal corners and edges. Its operating principle is based on high-frequency oscillating movements of a rectangular or triangular (delta) pad with a small amplitude. These fast, short movements allow the abrasive sheet to act very gently on the wood, creating a perfectly smooth surface free of marks and “swirls”.
The main advantage of a vibrating sander with a rectangular pad is its ability to work internal corners cleanly. Neither a belt nor a random-orbital sander, with their round or oval working surfaces, can get right into a corner. They inevitably leave a small unsanded patch that then has to be finished by hand. The rectangular pad of a vibrating sander allows you to sand the surface practically up to the joint itself, which is especially important when making drawers, carcass furniture, window frames and other items with right angles.
Models with a delta pad (the so-called “irons”) are even more manoeuvrable. Their pointed shape lets them reach the narrowest and most awkward places: between the slats of louvred doors, in the corners of carved elements, at the joints of complex connections. Such a tool is indispensable in restoration work or when making furniture with intricate decoration, where maximum precision and care are required.
Vibrating sanders are ideal for finish sanding before painting or lacquering. After working the surface with a random-orbital sander using P120–P150 abrasive, you can take a vibrating sander with P180–P240 abrasive and make the final pass. Because a vibrating sander does not make any rotational movements, the risk of leaving circular scratches on the surface — which can show through under lacquer — is reduced to a minimum. Sanding proceeds very gently, and with the tool guided correctly along the grain the surface comes out flawless.
Another area of use for a vibrating sander is between-coat sanding of paint and lacquer finishes. After the first coat of primer or lacquer is applied, the wood fibres can rise, creating roughness. To achieve a perfectly smooth final finish, this raised fuzz must be removed. Using a powerful random-orbital sander for this is risky — you can easily sand the thin layer of lacquer down to bare wood. A vibrating sander with fine-grit abrasive (P320–P400) and light pressure handles this task perfectly, gently knocking down the fuzz and matting the surface for better adhesion of the next coat.
Compared with other types of sander, the vibrating sander has lower output. Trying to level a worktop with it is a long and inefficient undertaking. Its element is small areas, edges, corners and the final touch-up. Working with a vibrating sander does not require much force. The tool’s own weight is enough for it to do its job effectively. The craftsman’s main task is to move the machine smoothly and evenly across the surface without lingering in one place.
Thus, the vibrating sander is not a universal tool, but it is indispensable as a complement to more powerful machines. It lets you bring the work to perfection, paying attention to the small things that distinguish a quality piece from a mediocre one. It is a tool for perfectionists, for whom every millimetre and a perfect result in the most hidden corners of a piece matter.

The hybrid approach: a symbiosis of hand and machine work
In real woodworking practice, one sanding method is rarely used on its own in pure form. The best results are almost always achieved by a skilful combination of machine and hand techniques. This hybrid approach can be compared to the work of a sculptor, who first roughly hews the stone with chisel and mallet and then takes up fine gouges and burins to work the small details. In joinery, the role of the “mallet” is played by sanders, and the role of the “burin” by our own hands and sandpaper.
The process of making almost any quality wooden product can be broken down into stages, in each of which one method or another will dominate. It all begins with rough work. After gluing up a panel, assembling a carcass or cutting out a complex part, we have a surface with height differences, glue marks and other defects. At this stage nothing is more effective than a powerful belt or random-orbital sander with coarse-grit abrasive. Their job is to quickly remove everything superfluous, level the surface and set the correct geometry. Trying to do this by hand is a waste of time and effort.
Once the basic geometry has been formed, the stage of intermediate sanding begins. Here the random-orbital sander with medium-grit abrasive (P120–P150) takes the stage. Its job is to remove the deep scratches left after the rough work and prepare the surface for the final touch-up. At this same stage hand work joins in. All the hard-to-reach places, internal corners, sharp edges and profiled mouldings the machine could not reach are carefully worked by hand using sanding sponges or blocks. It is very important at this stage to pay attention to the edges, rounding them over gently so that the finish does not chip off them in future.
The final stage of surface preparation before finishing is the most critical moment, where hand sanding plays the key role. Even after the finest work with a random-orbital sander, microscopic traces of its action can remain on the surface. To be sure of eliminating them, the entire surface of the piece is gone over by hand with fine-grit sandpaper (P180–P240), moving strictly along the grain. This process not only removes residual defects but also gives the surface a special silkiness. Moreover, before applying water-based finishes (stains, lacquers) it is recommended to dampen the surface lightly with water, let it dry and then go over it again gently with fine-grit abrasive. This raises and sands off the wood fuzz in advance, which would otherwise be raised by the first coat of finish and spoil its smoothness.
The hybrid approach is also indispensable when working on pieces that combine large flat areas with intricate decoration. For example, when making a panel door, the large central panel and the flat parts of the frame are sanded quickly and efficiently by machine. But the complex profile on the edges of the panel and frame, as well as all the joints and corners, require painstaking hand finishing. Only such a combination makes it possible to achieve high quality while still meeting reasonable deadlines.
A checklist of combined sanding stages:
- Rough work: Levelling the surface, removing defects. Tool: belt or random-orbital sander (P60–P80).
- Intermediate sanding: Removing scratches from the rough work. Tool: random-orbital sander (P100–P150). In parallel — hand work on mouldings, edges and hard-to-reach places.
- Finish sanding: Final touch-up of the entire surface. Tool: hand sanding along the grain (P180–P240) to remove all machine marks and give a perfect smoothness.
So there is no need to set hand and machine sanding against each other. They are two complementary methods that, in skilled hands, become a powerful means of achieving a flawless result. The machine gives speed and perfect geometry on large areas, while the hands give control, precision and attention to detail.
Choosing an abrasive: how grit affects the result
Any discussion of sanding would be incomplete without a detailed look at the main “protagonist” of the process — the abrasive material. Beginners often make the mistake of focusing all their attention on choosing a sander and completely forgetting that the end result depends 90% on correctly chosen sandpaper. The wrong choice of grit, the wrong sequence of changing it, or the use of poor-quality abrasive can undo all your efforts and even ruin an expensive blank. Understanding how abrasive works and how to use it correctly is a fundamental skill for any woodworker.
Abrasive grit is designated by a number with the letter “P” (according to the FEPA standard). The smaller the number, the coarser the abrasive grain and the more aggressively it works. Conversely, the larger the number, the finer the grain and the gentler the result. The whole sanding process is, in essence, the successive application of scratches to the wood surface. Each subsequent, finer abrasive must completely remove the scratches left by the previous, coarser one. If you skip one of the steps — for example, jump straight from P80 to P220 — the fine abrasive simply cannot remove the deep grooves from P80. As a result, both fine and deep scratches remain on the surface, which becomes especially noticeable after toning.
For convenience, abrasives can be divided into several groups by purpose. Coarse abrasives (P40–P60) are used for the roughest work: stripping old paint, levelling very coarse surfaces, calibrating parts. This is the “heavy artillery” that removes a lot of material but leaves very deep scratches behind. They must be used with great care and only where it is truly necessary. Medium-grit abrasives (P80–P120) are the main “workhorses”. They do the bulk of the levelling, removing tool marks and preparing the surface for finish sanding. P80 does a good job of removing the marks from P40–P60, and P120 those from P80.
Finishing abrasives (P150–P240) are used for the final preparation of wood before most types of finish (stains, oils, lacquers). They create a smooth, pleasant-to-the-touch surface, practically without visible scratches. For most joinery pieces, sanding up to P180 or P220 is more than enough. Going further generally makes no sense, since a surface that is too smooth and “burnished” absorbs stain less well and can have problems with lacquer adhesion. Very fine abrasives (P320 and above) are used mainly for between-coat sanding of paint and lacquer finishes or for preparing the surface for a gloss polish.
The choice of abrasive depends not only on the stage of work but also on the species of wood. Soft woods such as pine or alder sand more easily, but it is also easier to leave dents and deep scratches in them. So you should not use too coarse an abrasive on them; it is better to start with P80 or even P100. Hard woods such as oak, ash or beech require more effort and a more wear-resistant abrasive. For these you can safely start with P60 if you need to remove a significant layer.
The type of abrasive material itself also matters. The most common are aluminium oxide (electrocorundum) and silicon carbide. Aluminium oxide is stronger and more wear-resistant, and it is excellent for working both hard and soft woods. Silicon carbide is harder but also more brittle. Its sharp grains are well suited to sanding very hard materials, as well as to between-coat sanding of lacquers. The quality of the backing (paper or cloth) and of the bond also plays a huge role. Cheap sandpaper wears out quickly, sheds and clogs with dust, which makes the work inefficient and poor in quality.
Working with complex surfaces: profiles, edges and carving
Not all wooden products are simple flat panels. The art of joinery is rich in complex forms: shaped profiles on furniture fronts, thin edges, and elegant carving adorning the headboard of a bed or the legs of a table. Working with such elements requires a special approach to sanding, because here standard machine methods often prove powerless or even harmful. Quality processing of complex surfaces is a mark of high craftsmanship and attention to detail that distinguishes an exclusive handmade piece from mass factory production.
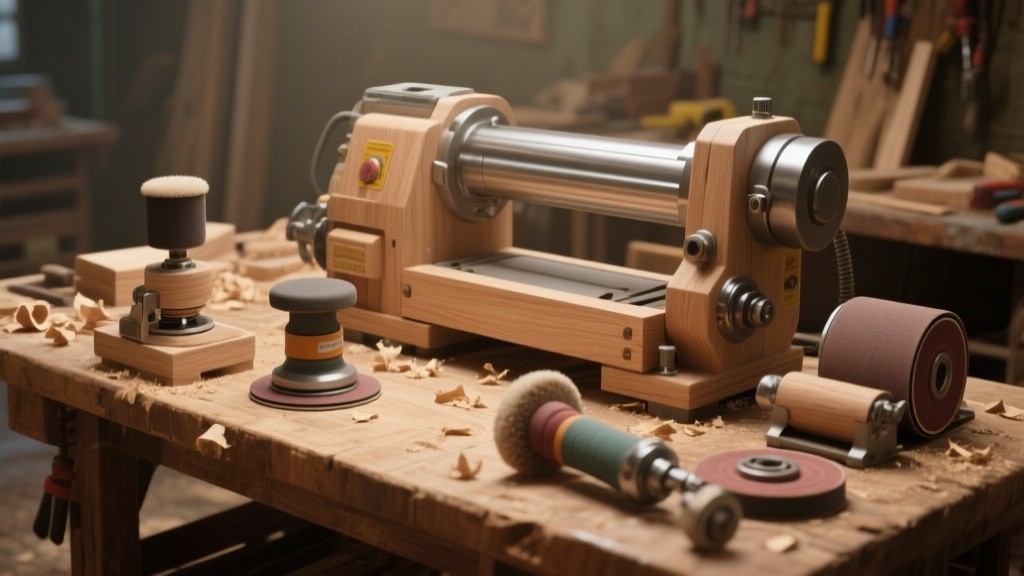
For sanding profiled surfaces produced with a router, power tools must be used with great care. A random-orbital sander can “round over” the crisp edges of the profile, and a vibrating sander simply cannot follow its complex relief. This is where hand methods and special aids come to the rescue. The simplest way is to wrap sandpaper around an object of a suitable shape: a wooden block for flat areas, a round stick (dowel) for concave radii. For more complex profiles you can make special sanding blocks that exactly reproduce the geometry of the router bit. They can be cut from wood or cast from epoxy resin.
Special sanding sponges are very handy for working with profiles. They consist of a piece of foamed polyurethane coated with abrasive. Thanks to their elasticity, a sponge conforms well to curved surfaces, distributing the pressure evenly. They come in different degrees of hardness: firmer ones for crisp edges, softer ones for gentle curves. Sponges are durable, they can be washed, and they are far more comfortable in the hand than a plain sheet of sandpaper. This is an indispensable tool for any craftsman working with profiled pieces.
Working the edges is another critical stage. The edge of a part is subjected to the greatest mechanical loads in use, and the durability of the whole piece depends on the quality of its finishing. Razor-sharp edges left after the saw or router are very vulnerable to chipping. In addition, on such sharp edges the layer of lacquer or paint comes out very thin and wears through quickly. That is why all edges need to be slightly rounded over. This is done by hand with light strokes of a sanding block with fine-grit abrasive at an angle of about 45 degrees. Just a few passes are enough to “knock off” the sharpness. The main thing is not to overdo it and to keep the roundover even along the entire length.
Sanding wood carving requires the highest level of skill. This is exclusively hand work — painstaking and meditative. Any careless movement can damage a fine element of the ornament. Here it is impossible to use any machines or even standard blocks. The carver’s main tools become small pieces of sandpaper folded several times or wound around a thin stick, as well as special abrasive cords that are handy for reaching narrow grooves. For working the smallest details and hard-to-reach places, home-made tools are sometimes used — for example, a piece of sandpaper glued to the tip of a toothpick.
The process of sanding carving proceeds from the deepest areas to the highest. First all the internal contours and hollows are worked, then the external, protruding elements. The abrasive grit is chosen very carefully, and one usually does not start with the coarsest grades so as not to “eat away” the fine details. It is important to constantly remove dust with a soft brush or compressed air in order to control the process and see every nuance of the relief. This is long and laborious work, but it is exactly what breathes life into carving, making it smooth, pleasant to the touch and ready for the finish that will bring out all its beauty.

Safety and ergonomics: how not to harm yourself or the piece
The sanding process, especially with power tools, involves certain risks to the craftsman’s health. In addition, incorrect technique can lead not only to injury but also to spoiling the part being worked. That is why observing safety practices and the principles of ergonomics is not a mere formality but an absolute necessity for anyone who works with wood. Caring for your health and organising the work process correctly are the key to long, productive work without unpleasant consequences.
The main enemy in sanding is, without doubt, wood dust. The finest particles, entering the respiratory tract, can cause irritation and allergic reactions and, with prolonged and regular exposure, lead to serious chronic lung diseases. That is why the use of respiratory protective equipment is mandatory. The simplest option is a disposable cup respirator, but for regular work it is far more effective to use a half-mask with filters or a full-face mask. This is especially important when working with exotic woods or MDF, whose dust can be toxic.
Protecting the eyes and hearing is no less important. During machine work, small chips or particles of old finish can fly off. So working without safety glasses is unacceptable. Power tools, especially powerful belt sanders, create a high level of noise that can lead to hearing loss over time. Using protective earmuffs or earplugs will help preserve the health of your ears. It is also worth taking care of your hands: comfortable gloves protect against splinters and vibration, though some craftsmen prefer to work without them for better tactile control.
Effective dust extraction is the key not only to health but also to the quality of the work. Most modern sanders are fitted with a dust-collection system. This may be a small bag or a plastic container that attaches to the machine itself. However, the most effective solution is to connect the tool to a workshop vacuum cleaner via a special hose. This removes up to 95% of the dust generated directly from the working area. As a result, you breathe clean air, the abrasive clogs less and lasts longer, and the surface being worked always stays clean, which allows better control of the process.
Proper organisation of the workplace also plays a huge role. The blank must be securely fixed to the workbench with clamps or other aids. Trying to sand a part while holding it with one hand is a sure path to defects and injury. Lighting should be adequate and correctly directed so that you can clearly see all the unevenness and surface defects. Side, raking light helps reveal the slightest scratches and “waves” that may be invisible under ordinary overhead light.
Ergonomics when working with a tool directly affects fatigue and productivity. The machine should be held confidently but without excessive tension. There is no need to press hard on the tool; its own weight is usually quite enough for effective work. Excessive pressure does not speed up the process but only leads to overheating of the motor, rapid wear of the abrasive and the appearance of defects on the surface. Movements should be smooth and even, and your posture comfortable and stable. Long jobs are best broken into several sessions with short breaks, to give your hands and back a rest.